
The best way to create a Spring project is using the spring initializer start.spring.io.

Steps to create the Spring Project
Follow the next steps to create a Spring project.
1 . Enter Spring initializr and select the Project and Spring Boot version
Introduce in the browser the next URL: https://start.spring.io/
Once you are in the spring initializr, select the Project, here is it on you to select Maven or Gradle, If you are a beginner I recommend selecting Maven Project.
Then select the Spring boot version is recommended to use the last stable spring version, in this case, we select the 2.7.2 version,(in the moment that maybe you read this is possible that the stable version change so you can use it, just please don’t use the SNAPSHOTS or M3 versions, because they are not stable versions and they continue working on it).
2 . Add the Project Metadata
In the next step, you need to add the Project Metadata to our Spring project.
- Group: This is the base package of our project.
- Artifact: This is the name that we are giving to our project.
- Name: This is the name of the artifact
- Description: This is the description of your project.
- Packaging: This option indicates if we need the project as a Jar or war, I recommend selecting the Jar because we don’t need anything from the web at this moment.
- Java: Select the java version that you will use, I recommend using java 11 because in the time that we are writing this tutorial java 11 is the stable version.
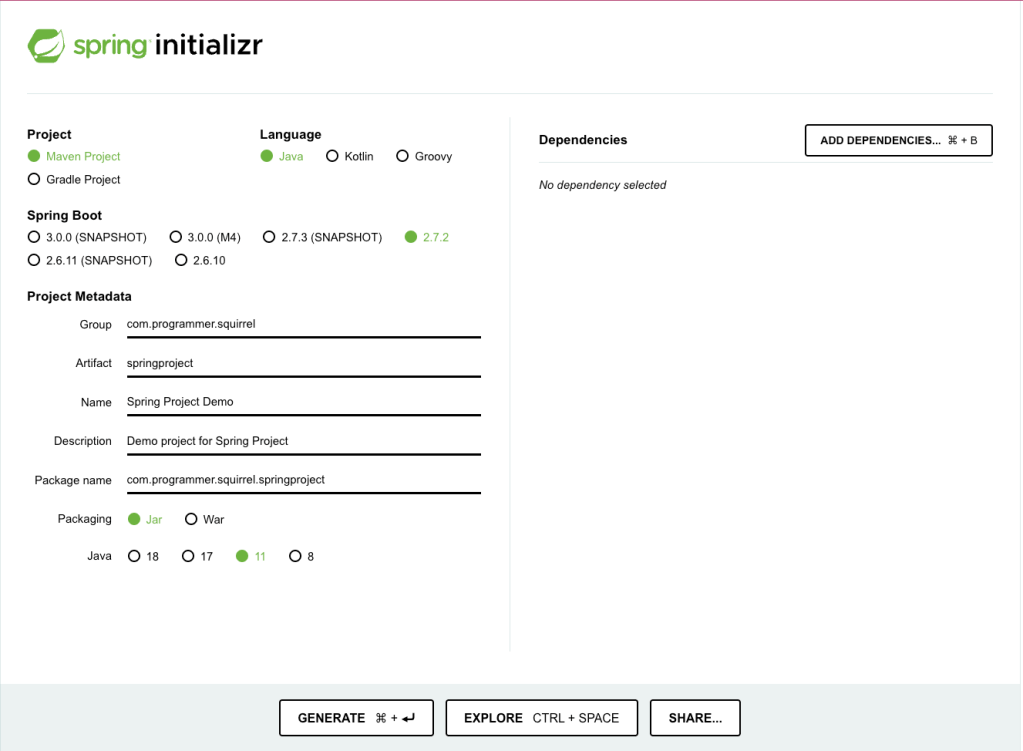
3 . Generate the Project
Finally, click on the Generate button to create our project.
After the project is downloaded you can import the recently created project with your favorite IDE and start to work on it.
Final Notes
For a basic Spring project, not are necessary to add any dependencies, but if you need one of them you can add it.
Happy Learning!!

Leave a comment